Showing posts with label Cupcakes. Show all posts

Sunday, 19 May 2013

Boston Cream Cupcakes.


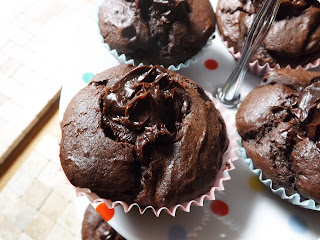
Oh my god these cupcakes are delicious! And the chocolate frosting is sooo good. I found this gorgeous recipe in my Hummingbird Bakery Cake Days cookbook which, is fast becoming my favourite recipe book ever! I decided to make them on Friday and I'm sharing the recipe now because they were just so yummy.
 
Sponge, custard and chocolate frosting; it's an incredible combination. With the addition of the milk the sponge is lovely, soft and moist and the custard adds a nice creamy texture and subtle flavour which, perfectly compliments the rest of the cupcake. If you try it on it's own it sort of tastes like the custard in egg custard tarts. The chocolate frosting is so rich and luxurious as well so all in all this is a pretty great cupcake. I'd love to go to the Hummingbird Bakery.
 
 
Recipe - makes 12-16 cupcakes
 
For the Sponge
 
80g (3oz) unsalted butter, softened
280g (10oz) caster sugar
240g (8 1/2oz) plain flour
1 tbsp. baking powder
1/4 tsp. salt
240ml (8 1/2 fl oz) whole milk
2 large eggs
1 tsp. vanilla essence
 
For the Custard Filling
 
250ml (9 fl oz) whole milk
1/2 tsp. vanilla essence
2 large egg yolks
50g (1 3/4 oz) caster sugar
1 tbsp. plain flour
1 tbsp. cornflour
 
For the Chocolate Frosting
 
400g (14oz) icing sugar
100g (3 1/2oz) cocoa powder
160g (5 1/2oz) unsalted butter, softened
80ml (3fl oz) whole milk
finely grated dark chocolate, to decorate
 
Method
 
1. Preheat the oven to 190C, Gas mark 5, and line a muffin tin with muffin cases.
 
2. Using a hand-held electric whisk or a freestanding electric mixer with the paddle attachment, mix the butter, sugar, flour, baking powder and salt on a low speed until the mixture resembles fine breadcrumbs.
 
3. Place the remaining ingredients in a jug and whisk by hand, then pour three-quarters of this mixture into the dry ingredients and mix on a low speed to combine. Increase the speed to medium and keep mixing until smooth and thick, scraping the sides of the bowl occasionally. Add the remaining milk mixture and beat until combined and smooth.
 
4. Spoon the batter into the paper cases, filling them by two-thirds. Any remaining batter can be spooned into more cases in another tin. Bake in the oven for 18-20 minutes or until well risen and springy to touch, then leave to cool completely.
 
5. While the cupcakes are cooling, make the filling. Pour the milk and vanilla essence into a saucepan and bring to the boil. Meanwhile, whisk the remaining ingredients together by hand in a bowl until smooth and well combined.
 
6. Once the milk is boiling, remove from the heat and pour 4-5 tbsps. into the egg-yolk mixture to loosen, then return this mixture to the pan of hot milk, stirring to incorporate.
 
7. Return the pan to the heat and bring to he boil, whisking constantly to prevent lumps. Boil for at least 1 minute to ensure the flour is properly cooked. Once thickened, tip the custard into a bowl and cover with cling film to prevent a skin forming, then leave to cool completely for 30-40 minutes.
 
8. To make the frosting, use the electric whisk or freestanding mixer with paddle attachment to slowly beat together the icing sugar, cocoa powder and butter until sandy in texture. Gradually pour in the milk, then increase the speed to high and whisk until soft and fluffy.
 
9. Using a sharp knife or apple corer, make a hole in the centre of each cupcake about 2cm in diameter and 3cm deep, reserving the scooped-out pieces of sponge. Pipe or spoon the custard into the hole in each cupcake, then replace the sponge lid, trimming it if necessary to ensure the top is fairly level. Divide the chocolate frosting between the cupcakes, smooth the tops with a palette knife and add a swirl. (That is the hummingbird bakery way, I piped a swirl using a large round piping nozzle instead. This icing is great for piping; soft enough to pipe but, thick and stiff enough to hold it's shape.) Sprinkle with grated chocolate to decorate.
 
 
Enjoy!
 
Thankyou for reading!
Love Courts x


Thursday, 28 March 2013

Chocolate Fudge Cupcakes.

 
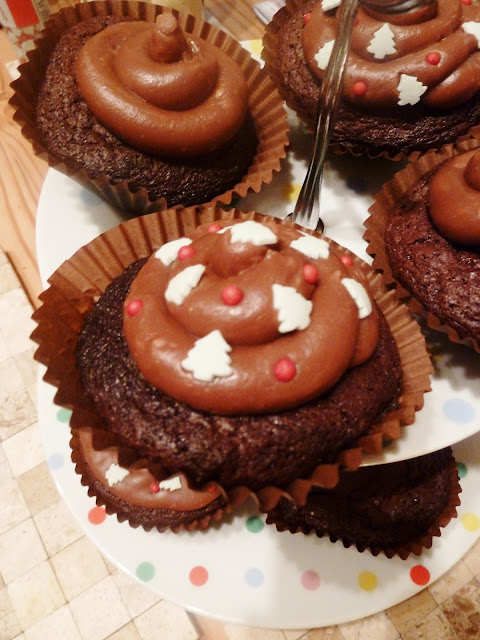
Do you ever find that some things are just too sweet, sickly and chocolaty? Yeah, no me neither! These cupcakes are gorgeous! I use Hayley Tamaddon's (an actress who used to be in my beloved Emmerdale and who also won Dancing on Ice) chocolate fudge cake recipe from the Celebrity Britain's Best Dish. It is the best chocolate cake I have ever tasted and so, rich and moist! The trick is to include sour cream in your chocolate cake recipe, it makes perfect chocolate cake and somehow, and I don't really know why, but, it makes a gorgeous light, moist sponge and enhances the chocolate flavour. Thank you sour cream!
 
I decided to convert her cake recipe into cupcakes though so, I filled them with her rich chocolate ganache topping and then topped them with her sweet, sugary chocolate coffee fudge cream filling. I then scattered over some tiny fudge pieces as I thought it would look quite cute. I bought these tiny fudge pieces from Sainsbury's for I think it was £1.39 which, is quite expensive really so feel free to buy proper fudge and then just crumble it up or chop it up into tiny pieces as I would imagine that would work out cheaper. I was just a bit lazy but then after making three different components to make this one lovely cupcake I think that can be forgiven.
 
If you are a chocolate lover like myself and have the time then please give them a go as they are so yummy and if you do try them I hope you enjoy them!
 
Recipe - makes 12 cupcakes
 
Chocolate Cake
110g (4oz) butter at room temperature
220g (8oz) dark brown sugar
2 eggs
165g (6oz) self raising flour
55g (2oz) cocoa
½  tsp bicarbonate of soda
½ tsp baking powder
140ml (1/4pint) sour cream
Chocolate Ganache Filling
200g (7oz) dark chocolate
140ml (1/4 pint) double cream
1 tbsp cocoa powder
Chocolate Coffee Fudge Frosting
 (5oz) Butter, at room temperature
165g (6oz) icing sugar
½ tsp ground coffee beans
Few drops vanilla essence
2tbsp cocoa powder


Method
 
Oven – 180°c.
You will need 1x 12 hole cupcake tray.
 
Place 12 cake cases in he cupcake tin.
 
For the cake, cream together the butter and sugar using an electric whisk. Gradually beat in the eggs. Add the sour cream. Sieve together the flour, cocoa, baking powder and bicarbonate of soda. Fold in to the mixture.
 
Divide the mixture between the cake cases and bake for 15 minutes or until risen and just firm to touch. 
 
For the ganache filling, warm the milk on a low temperature until hot. Remove rom the heat and add the broken up chocolate stirring constantly until melted. Make the cocoa into a paste by adding hot water. Add the cocoa to the melted chocolate and leave to cool.
 
Meanwhile, make the frosting. Sieve icing sugar, coffee and cocoa into a bowl. Add butter and mix together until creamy. Add a few drops of vanilla essence. (If you don't like coffee flavours then just leave it out as the frosting still tastes lovely without.)
 
Once the cakes are cooled, dig out a hole from each cupcake using an apple corer
 

Put 2 tsps. chocolate ganache filling in each.
 
 
Put 2 tsps. of the frosting on top of each and use a pallet knife to smooth over and decorate with the fudge pieces.


Thankyou for reading!
Love Courts x
 

Saturday, 23 March 2013

Cream Tea Cupcakes.


A couple of weeks ago I made these very yummy cream tea cupcakes as a little Mother's Day gift. I also made my family a fried breakfast in the morning which, was quite an experience. It actually worked out really well in the end but, it got me running around the kitchen like a mad woman first trying to plate everything up and I also learned that fried eggs are really not my specialty. In fact, I am a terrible egg fryer. I'll stick to scrambled eggs from now on I think. Also, oil gets really hot... and spits ALOT!
 
Then in the evening I also made a Tortilla bake and some Enchiladas for tea which, were also very tasty as Mexican food always is so, I like to think I was quite a good daughter for my lovely Mum for the day.
 
These cupcakes were also delicious. They are very cute and girly and also really quick and easy to make which, is always great and they are basically like little scones, especially with the addition of the raisins and the crumbly texture of the cupcakes. Scones are always delicious and these cupcakes didn't disappoint either! Slathering anything with clotted cream and jam is a winner in my book.
 
Recipe
 
Makes 10 cupcakes
 
85g/ 3 oz butter, softened
85g/3 oz caster sugar
1 large egg, lightly beaten
1/2 tsp. vanilla extract
85g/ 3 oz self-raising flour
1tbsp. milk
40g/ 1 1/2 oz raisins
 
To decorate -
115g/ 4 oz small strawberries, hulled and sliced
1 tbsp. strawberry jam
115g/ 4oz clotted cream
icing sugar, for dusting.


Method
Preheat the oven to 190C/ Gas Mark 5. Put 10 paper cases in a bun tray.
Place the butter and caster sugar in a large bowl and beat together until light and fluffy. Gradually beat in the egg and vanilla extract. Sift in the flour and, using a metal spoon, fold gently into the mixture with the milk and raisins.
 
Spoon the mixture into the paper cases. Bake in the preheated oven for 15-20 minutes, or until risen, golden and just firm to touch. Transfer to a wire rack and leave to cool.
 
Using a serrated knife, cut a circle from the top of each cupcake. Gently mix together the strawberries with the strawberry jam and divide among the cupcakes. Top each with a small (or generous :P, whatever takes your fancy. Generous definitely took mine.) dollop of clotted cream and place the cupcake tops back on. Finally, dust with icing sugar and enjoy!
  
 Byee.
Thankyou for reading!
Love Courts x


Monday, 25 February 2013

Carrot Cupcakes.


Carrot Cake is probably my favourite cake, I love it and I found this really lovely recipe for the perfect carrot cake on the Joy of Baking website a couple of years ago. I deffinately reccommend looking on the website as it's absoloutely incredible with every recipe you could ever think of. It is also american so there are lots of lovely american treats including lots of chocolate and peanut butter recipes which, are always good in my books.
 
 
This carrot cake recipe is gorgeous though. The sponge is so light, soft and moist and it has a really lovely sweet flavour with a nice warm spice coming from the cinnamon too. The cream cheese icing is also delicious, sugary and rich and goes perfectly with the carrot sponge.


Recipe - makes 24 cupcakes
 
100g walnuts
340g raw carrots, finely grated
260g self-raising flour
1 tsp. bicarbonate of soda
1 1/2 tsps. baking powder
1/2 tsp. salt
1 1/2 tsp. ground cinnamon
4 large eggs
300g caster sugar
240ml vegetable oil
2 tsp. vanilla essence
Cream Cheese Frosting -
57g butter
227g cream cheese
230g icing sugar
1 tsp. vanilla essence
1 tsp. finely grated lemon zest
 
Method
 
Pre-heat the oven to 200C and place 24 cupcake cases in two 12 hole bun tins.
 
Peel and finely grate the carrots.
 
Grind the walnuts in a food processor and in a large bowl mix together the ground walnuts, sieved self-raising flour, cinnamon, baking powder, bicarbonate of soda and salt.
 
In another bowl, using an electric mixer, beat the eggs until frothy (about 1 minute). Gradually add the sugar and whisk until the batter is thick and pale in colour (about 3-4 minutes). Add the oil in a steady stream and then beat in the vanilla extract. Pour the liquid into the flour mixture and beat until incorporated.
 
Fold in the grated carrot and evenly divide the batter between the cupcake cases.
 
Bake for 15-17 minutes or until the cupcakes are just firm to touch and a skewer inserted comes out clean.
 
Finally, make the cream cheese frosting by beating the cream cheese and butter together with an electric whisk, blending until there are no lumps. Gradually add the sifted icing sugar and beat, on low speed, until fully incorporated and smooth. Lastly, beat in the vanilla extract and lemon zest and top each cupcake with about 1 tsp. of cream cheese icing and a walnut piece.
 
Enjoy!


Thankyou for reading!
Love Courts x

Sunday, 17 February 2013

Red Velvet Cupcakes.

 
Well, being the great blogger that I am I only just realised that my Valentines Day post never actually posted. As I was quite pleased with what I had written though and don't really feel like writing it all again I think I'm just going to go with it. So, Happy 3 days late Valentines Day everyone! Am I getting away with it? Yeah, I don't think so either. Nevermind, enjoy the recipe!

First and foremost, Happy Valentines Day! (Sorry again that it's now the 17th of February :/.) These cupcakes are red which, I think makes them at least a little bit valentines day-ee don't you? (I guess it doesn't really matter now :P.) Although, my Hummingbird Bakery cookbook actually lists them under Halloween so, take that as you will :/. I promise I’m not a hater of Valentines Day and all things romantic though. I must admit though that this week I was much fonder of Pancake Day on Tuesday! Who wouldn’t love a day dedicated to eating pancakes though? It’s heaven. I’d just like Valentines Day a hell of a lot more too if I wasn’t spending it alone with a tub of Ben and Jerry’s and a DVD of the notebook. At least I can say Ryan Gosling was my Valentine ;), it’s just a shame that thousands of other girls will be saying exactly the same thing. Anyway, I’m only joking, that is not my Valentines plan… Seriously, it’s not. Don't get me wrong though I sure wish it was. I’d love to gorge myself on a deep pan pizza for one and top it off with a nice Gu pudding for afters but, for me work calls L. Cue crying. I work two nights a week, how is it even possible that I can’t cope with two nights a week? I don’t know but, somehow it is.

Anyway, on to happier times. Earlier in the week I made these Red Velvet Cupcakes using the recipe from my Hummingbird Bakery Cake Days cookbook which, I got as a Christmas Present from my best friend Michelle, thanks Miv! It’s a really amazing cook book and I actually love it so much already that I now want to plan a trip to London purely so I can go to the Hummingbird Bakery and taste their cupcakes. The Red Velvet Cupcake is their most popular flavour too so, I thought I’d try it first and I also want to start baking a few more classic cupcakes like a basic vanilla and a carrot cake cupcake so, I thought a Red Velvet Cupcake would fit with that plan. I wasn’t sure what to make of this cupcake originally as it called for a whole bottle of red food colouring to be tipped in which, worried me a bit but, I went with it. It didn’t help either that foolishly after mixing together the bitter cocoa powder, the tangy vanilla essence and the chemically tasting food colouring I very stupidly licked the spoon. Oh god! Big mistake. Never do that but, ofcourse you wouldn’t, who in their right mind would? I was left with bright red teeth and the most disgusting dry, tacky, bitter taste in my mouth. Never again.
 
Don't be alarmed though, this recipe when finished creates amazing moist and soft red cupcakes and the cream cheese frosting is sweet, sugary and delicious. I’d never had a red velvet cupcake or cake before as it’s very American so I don’t really often see it over here in the UK. As such I didn’t really know what to expect from the flavour and I’m still not even sure if the flavour I got is correct as I have nothing to compare it too. Nonetheless my Mum, Dad and nephew all absoloutely adored them so hopefully I did alright. These cupcakes have a slight and very mild chocolate flavour to them and they are very sweet so, perfect if you have a sweet tooth which, I'm pretty sure we all do. As I said my Mum, Dad and nephew all love them and they've all had 2 or 3 each now so they've got to taste pretty good.  It is a lovely cake and the sponge is unbelievably light and soft. Not to mention they look gorgeous and classy with their deep, rich red colour. I think it's safe to say I've found my go to Red Velvet Cupcake recipe, afterall I can’t open a Cupcake Shop without one can I? Thanks very much Hummingbird Bakery!

Recipe
Makes about 15-18 cupcakes

For the sponge-
120g (4oz) unsalted butter, softened
300g (10 1/2oz) caster sugar
2 large eggs
20g (3/4oz) cocoa powder
40ml red food colouring (such as Dr Oetker)
1 tsp vanilla essence
300g (10 1/2oz) plain flour
1 tsp salt
240ml buttermilk
1 tbsp white wine vinegar
1 tsp bicarbonate of soda
For the frosting-
100g (3 1/2oz) unsalted butter, softened
600g (1lb 5oz) icing sugar
250g (9oz) full-fat cream cheese (such as Philadelphia)

Method
1. Preheat the oven to 190C, Gas mark 5, and line a muffin tin with muffin cases.
2. Using a hand-held electric whisk or a freestanding electric mixer with the paddle attachment, cream the butter and sugar together until pale and fluffy. Break in the eggs one at a time, beating thoroughly after each addition and mixing in the scrapings from the sides of the bowl.
3. In a separate, small bowl, stir together the cocoa powder, food colouring and vanilla essence to form a paste. Add the paste to the batter, mixing thoroughly until the paste is completely incorporated.
4. Sift together the flour and salt in another bowl, then add the flour to the batter in two batches, alternating with the buttermilk and mixing thoroughly after each addition. Lastly, in another bowl, mix the vinegar and the bicarbonate of soda together by hand and add it to the cake batter, mixing until it is fully incorporated.
5. Spoon the batter into the paper cake cases, so they are two-thirds full, using any remaining batter to fill up to 6 more cases in another tin. Place in the oven and bake for 18-20 minutes or until the sponge bounces back when lightly pressed. Allow the cupcakes to cool completely before you frost them.
6. Using the electric whisk or freestanding mixer with the paddle attachment, and mixing on a low speed, beat the butter and icing sugar together until no large lumps of butter remain and the mixture is sandy in texture. Add the cream cheese and mix together slowly until everything is incorporated, then increase the speed to medium and beat the frosting until it is soft and fluffy.
7. Cover all but one of the cupcakes with 2 tablespoons of the cream cheese frosting, smoothing it down with a palette knife and making a swirl in the middle of the frosting for a decorative finish (or pipe the cream cheese frosting onto the cupcakes).
8. Place the remaining cupcake in a food processor and blitz into fine crumbs, then sprinkle the frosted cupcakes with the red crumbs. Enjoy!


Thankyou for reading!
Love Courts x

Monday, 28 January 2013

Raspberry Amaretti Cupcakes.


These little Raspberry Amaretti Cupcakes are lovely and tasty. They are very cute and girly with the pretty pink raspberries and velvety, white mascarpone icing on top and the sponge has a delicious almondy, marzipan essence to it from the addition of amaretti biscuits which, makes these cupcakes feel a bit special. They are also very light and refreshing cupcakes with the addition of the fresh raspberries and the mascarpone topping which, is quite nice as some cupcakes can be a bit heavy with a dense sponge and a hefty dollop of frosting, don't get me wrong though, either's fine by me :P.
 
I really really enjoyed these cupcakes and they were actually very easy and quick to make and decorate too which, is always nice. I hope you enjoy them too!
 
 
Recipe
75g (3 oz) amaretti biscuits
75g (3 oz) light muscovado sugar
100g (3 1/2 oz) lightly salted butter, softened
2 eggs
75g (3 oz) self-raising flour
1/2 tsp. baking powder
 
Topping
200g (7 oz) mascarpone
8 tablespoons icing sugar, plus extra for dusting
250g (8 oz) fresh raspberries
 
Method
 
Line a 12-section bun tray with paper cake cases. Put the amaretti biscuits in a polythene bag and crush with a rolling pin.
 
Tip the crushed biscuits into a bowl and add the muscovado sugar, butter, eggs, flour and baking powder. Beat with a hand-held electric whisk for about a minute until pale and creamy. Divide the cake mixture between the paper cases.
 
Bake in a preheated oven, 180C, Gas Mark 4, for 20 minutes or until risen and just firm to touch. Transfer to a wire rack to cool.
 
Beat the mascarpone with a wooden spoon in a bowl to soften, then beat in the icing sugar. Spread over the cakes with a small palette knife. Arrange a layer of raspberries on top and dust with icing sugar.
 
Voilaa!


Thankyou for reading!
Love Courts x

Sunday, 20 January 2013

Almond Praline Cupcakes.


The other day I decided to make these Almond Praline cupcakes, another great recipe from my favourite 200 Cupcakes cookbook. I loved how simple they sounded and the lovely addition of the Almond Brittle to the top so, I thought I'd give them a go as I already had most of the ingredients in the cupboard anyway and I am also a big fan of nutty flavoured things and absoloutely love buttercream frosting so I thought nothing could really go wrong with these lovely little cupcakes.
 
Now, I can honestly say, despite having to have two attempts at making the caramel :/, the almond brittle is actually very simple to make and it kind of makes you feel like you are working in a sweet shop too which, is a nice feeling you don't get to experience everyday. My mistake though was assuming that nothing could go wrong with using golden caster sugar to make caramel... ofcourse when making caramel though, you are looking for a lovely golden brown colour to know when your caramel is done but, my caramel was golden from the very begginning so I had no idea when it was actually ready. Anyway, my poor first attempt at making the caramel left me with a sticky, soggy mess, and after a stint in the fridge, a crumbly, grainy praline which, tasted a bit odd and sort of irony :/, I'm not sure how I managed that either. However, on my far more successful second attempt at making caramel I made sure I used white caster sugar and managed to make a much more appealing glossy praline which, had a really yummy candyfloss type flavour to it. Much nicer!
 
As my first attempt at making praline went... well, very... very wrong, I wasn't able to include any in my actual cupcakes as I had already made the mixture so I didn't really want to leave it for too long before baking the cupcakes so, I just made them and they are so yummy. They are the perfect vanilla cupcake for me and together with, the delicious buttercream frosting create a gorgeous, simple, tasty little cupcake. Add in the almond praline and you have cupcake perfection.
 
They look rather sweet too I think with their fluffy frosting and shiny praline topping. I hope you enjoy them too if you decide to try them!


Recipe

Makes 12

sunflower oil, for brushing
250g (8oz) caster sugar
100 ml water
75g (3 oz) flaked almonds
125g lightly salted butter, softened
1 teaspoon vanilla extract
3 eggs
150g (5 oz) self-raising flour
1/2 teaspoon baking powder

Frosting
75g (3 oz) unsalted butter, softened
125g (4 oz) icing sugar
1 teaspoon hot water

Method

Line a 12-section bun tray with paper cake cases. Brush a baking sheet lightly with oil. Put 150g (5 oz) of the caster sugar in a small saucepan with the water and heat gently until it has dissolved. Bring to the boil and boil rapidly until the syrup has turned to a pale golden caramel. Immediately stir in the flaked almonds. When coated, turn out on to the prepared baking sheet, spread in a thin layer and leave until cold and brittle.

Snap half the praline into jagged pieces and reserve. Process the remainder in a food processor until ground.

Put the butter, remaining caster sugar, vanilla extract, eggs, flour and baking powder in a bowl and beat with a hand-held electric whisk for about a minute until light and creamy. Stir in the ground praline. Divide the cake mixture between the paper cases.

Bake in a preheated oven, at 180C, Gas Mark 4, for 18-20 minutes or until risen and just firm to touch. Transfer to a wire rack to cool.

Beat together the butter and icing sugar with the hot water in a bowl until pale and creamy. Spread over the cakes using a small palette knife. Decorate with the praline pieces and enjoy!

 
Thankyou for reading!
Love Courts x


Monday, 7 January 2013

Pistachio Cream Cupcakes.


These cupcakes are so cute and delicious. They are actually pretty simple and quick to make too and don't really have too many ingredients to them either which, is always a bonus. Again I found this lovely recipe in my 200 cupcakes cookbook which, is brilliant and has some really lovely, unique recipes in it. If you are a fan of making cupcakes or just baking in general I would deffinately reccommend getting it. Only £3.74 on Amazon, you can't really go wrong. It's a bargain.
 
 
I decided to make these little cupcakes yesterday as I have always been a fan of pistachios and I really liked the sound of the whole recipe. They taste really lovely but, my favourite thing about them is actually how sweet they look. I love the pistachio dusting around the base of the cakes, it's a really sweet idea and I love the colour pairing of the snow white icing and the pastel green chunks of pistachio, it makes the cupcakes look quite elegant and girly.
 

As I said though, more importantly, the taste is really lovely too. In the book the recipe calls for the use of Almond liqueur however, to save money and because I already had some in the house, I just used some almond essence which, worked really well. Obviously though, if you do have the pennies to spare or maybe already have some almond liqueur in the house I would deffinately use it as I bet it tastes delicious! Still, almond essence works well though for the baker on a budget!
Sometimes I feel a bit like an 18 year old going on 80 with my baking addiction and love of making cupcakes, then there are days like today when I wake up with a huge smile on my face and hurry downtairs purely to watch the first episode of the new series of Glee which, makes me feel like I'm a 12 year old again. One of these days I will work out how to act my age.
 
Recipe
 
Makes 12.
 
150g (5 oz) Pistachio nuts
125g (4 oz) lightly salted butter, softened
125g (4 oz) caster sugar
2 eggs
150g (5 oz) self-raising flour
1/2 tsp. baking powder
 
To decorate:
300ml (1/2 pint) double cream
2 tablespoons icing sugar
2 tablespoons almond or orange flavoured liqueur or 2 teaspoons of almond essence.
 
 
Line a 12-section bun tray with paper cake cases. Process the pistachio nuts in a food processor until finely chopped (remove the shells and skins to the best of your ability first if necessary).
 
Beat the butter, caster sugar, eggs, flour, baking powder and 50g (2 oz) of the ground pistachio nuts with a hand-held electric whisk in a bowl for about a minute until light and creamy. Divide the mixture between the paper cases.
 
Bake in a preheated oven, 180C, Gas Mark 4, for 20 minutes or until risen and just firm to touch. Transfer to a wire rack to cool.
 
Peel away the paper cake cases. Whip the cream with the icing sugar and liqueur in the bowl until only just holding its shape. Transfer half to a separate bowl and reserve. Spread the remainder around the cakes and roll in the remaining ground pistachio nuts to coat the sides. Spoon the reserved flavoured cream on top and decorate with a few pieces of pistachio.
 
Enjoy!
 
 
Thankyou for reading!
 
Love Courts x

Tuesday, 4 December 2012

Chocolate Orange Brownie Cupcakes.

 
I thought I'd go with some nice festive red font today as it is getting closer to Christmas which, is very exciting. I also thought I would post this lovely, yummy recipe for Chocolate Orange Brownie cupcakes which, is delicious and very festive. I made these a few weeks ago in practise ready for Christmas and I used Jamie Oliver's Bloomin' Brilliant Brownies recipe which, literally makes the best brownies I have ever tasted. I make them all the time and I love them, they are so rich and chocolatey and have a lovely moist centre and chewy outside which, is gorgeous.
 
I often make them chocolate orange flavour aswell by using Terry's chocolate orange instead of dark chocolate and I thought that would be perfect for Christmas as orange is quite festive and gives a lovely christmassy flavour. I've never made them into cupcakes before though but, I just used the same recipe and it actually worked out fine. I found that the brownie cupcake stuck to the bottom of the cake case a little more than normal cupcakes but if you just leave them to cool for long enough they should come out just fine.                                                                            They have an amazing flavour and are so rich and chocolatey that you can just have them on their own as some people may find adding icing a bit too sickly. Me on the other hand, I adore chocolate so adding chocolate orange fudge frosting to the top has to be done. It is incredible.
Recipe

250g unsalted butter
100g Terry's Chocolate Orange

100g Dark Chocolate
1 Small Packet of Magic Stars
1 Small Packet of Milkybar Buttons
80g cocoa powder, sifted
65g plain flour, sifted
1 teaspoon baking powder
360g caster sugar
4 large free-range or organic eggs


For the Chocolate Orange Frosting
100g Terry's Chocolate Orange
2 tbsp. Milk
50g unsalted butter
75g icing sugar

Method

Place 12 cupcake cases in a 12 hole cupcake tin and preheat your oven to 180°C/350°F/gas 4.

In a large bowl over some simmering water, melt the butter and the chocolate and mix until smooth. Add the magic stars and milkybar buttons, if you’re using them, and stir together. In a separate bowl, mix together the cocoa powder, flour, baking powder and sugar, then add this to the chocolate mixture. Stir together well. Beat the eggs and mix in until you have a silky consistency.

Pour your brownie mix into the cupcake cases and place in the oven for around 18 minutes. You don’t want to overcook them so, unlike cakes, you don’t want a skewer to come out all clean. The brownies should be slightly springy on the outside but still gooey in the middle. Allow to cool.

While the cupcakes are cooling prepare the Chocolate orange fudge frosting by putting the chocolate, milk and butter in a small heavy-based saucepan and heating gently, stirring until the chocolate and butter have melted. Remove from the heat and stir in the icing sugar until smooth.

Finally, spread the frosting over the tops of the cooled brownie cupcakes. If not thick enough to spread allow the frosting to set a little by cooling in the fridge so that it will hold it's shape when spread or piped onto the cupcakes.

Enjoy!

Thankyou for reading!

Love Courts x


Tuesday, 30 October 2012

Marshmallow Cupcakes.

 
I am writing this while watching last weeks Red Dwarf episode so lets see how this turns out. I love Red Dwarf and the Cat is hilarious, I'm really glad it's come back. I decided to make Marshmallow cupcakes this week in practise for christmas again as I was hoping to make them for my two little cousins and my little nephew instead of the Black Forest Gateau ones I am making for the adults. I've never been a fan of marshmallows though but, these cupcakes looked really sweet in my cupcake cook book so I decided to make them anyway.
 
As a vegetarian I also had to order some special vegan marshmallows from ebay as all the ones in the shop were made with gelatine. They were quite expensive but, they were actually really yummy and my mum who is also not a big fan of marshmallows actually said she much preferred the veggie ones to normal marshmallows.
 
These marshmallow cupcakes are very sweet and really tasty. The cream topping is gorgeous and the sponge is lovely and soft. However, I was a little dissapointed with the overall finish and didn't think they looked as professional and cute as in the book. I need to work on the topping if I'm going to make them for christmas and I'm also going to add a bit of festive sparkle with some edible silver glitter if I do make them. I also had to top them with ordinary pink marshmallows this time as I ran out of the vegetarian ones but that would be fine for the boys and I just pick them off too. I think the shop I bought the veggie vanilla marshmallows from on ebay also sells some pink strawberry flavoured ones too though if I did want to make them completely veggie.

 
Recipe

50g marshmallows
125g butter
100g caster sugar
2 eggs
150g self-raising flour
1/2 tsp. baking powder
1 tsp. vanilla extract

Topping-
75g marshmallows, plus extra chopped pieces to scatter
300ml double cream


Method

1. Line a 12 section bun tray with paper cupcake cases and cut the marshmallows into pieces using kitchen scissors.
2. Put all the remaining cake ingredients in a bowl and beat with a hand-held electric whisk for about a minute until light and creamy. Stir in the marshmallow pieces and then divide the cake mixture between the cupcake cases.
3. Bake in a preheated oven at 180C for about 15 minutes or until risen and just firm to touch. Transfer to a wire rack to cool.
4. Cut the marshmallows for the topping into small pieces and put about a third in a small saucepan with half the cream. Heat very gently until melted. Tip into a bowl and leave to cool.
5. Whip the remaining cream in a bowl until just holding its shape. Stir in the marshmallow cream and remaining marshmallow pieces, then pile on to the cakes. Finally, scatter with extra chopped marshmallow pieces to serve. Waalaaa!

 
Thankyou for reading!
Love Courts x